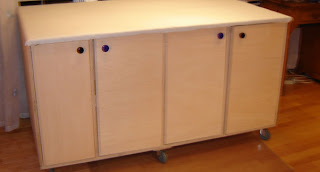
It still needs painting, but I feel like I've reached a major milestone... All construction is completed.
May I present to you....
the back
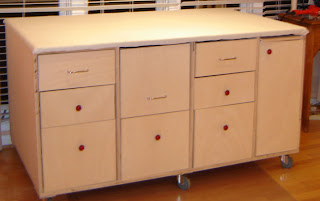
and the front
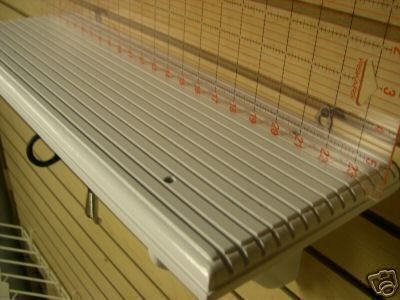
Sorry about the fuzziness of the pics. I'm not the best photographer anyway, and I'm shaking with excitement (and I'm only slightly kidding about that last part).
I was a little disappointed yesterday b/c none of the drawer fronts line up right, but dh reminded me that it's not a professional job ("and it looks it"). It is my first project with drawers and only my second project with doors, so I'm feeling okay.
All the knobs and handles come from the
Habitat Restore center. They were pretty cheap, and I bought sillier knobs because of it. The back has black and blue knobs, the front these cool red jewel like ones.
This is probably more information than you need, but I chose to use pulls on the top with rounded edges because I hate the knob in my kitchen b/c they catch my zipper fly. Hence the three center drawers with pulls.
I did go to the restore center before I began building and thought about cobbling together a cabinet from old kitchen cabinets. It certainly would have been cheaper (probably not even counting the hours of work I've put into this thing), but then it wouldn't have been just what I wanted.
Such as....
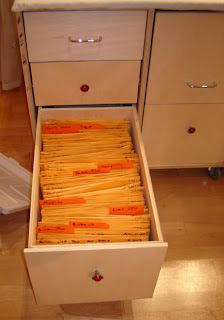
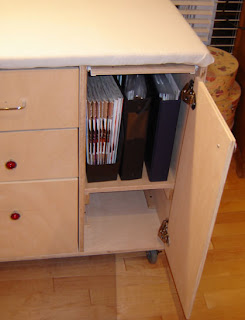
A file drawer to hold my patterns without squishing them. It's slightly wider than the normal so the 9x12 envelopes fit easily AND it's taller so I can have dividers sticking up, and my Jalie and Hot Patterns envelops fit in it as well.
Above that:
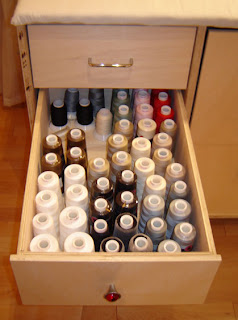
One drawer that holds all my cone thread!
And then:
Drawer for random accessories to my machines.
To the right... well, this was actually an accident, but I think it's ended up well. For some reason the top middle drawer did not want to fit. I think the sides of the cabinet ended up not being square. Dh suggested having a larger drawer front, and it works well.
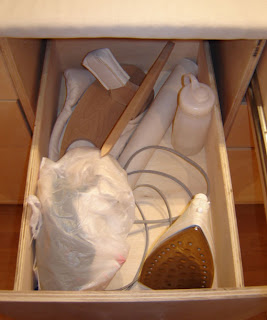
It holds my iron and my lesser used pressing aids (and iron cleaner)
Under that, more patterns (no it's not even half full).
Last column of drawers:
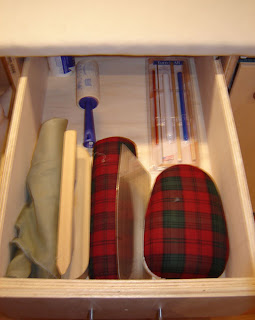
Most used pressing aids on top
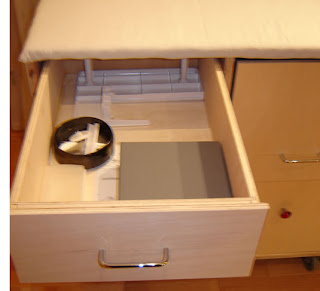
AND THEN TWO EMPTY DRAWERS! Who knows what wonders will fill them!
The far right has a shelf for my notebooks with patterns in them. The bottom shelf was originally for those large Jalie and Hot Patterns patterns, but I don't need it any more.
And my favorite piece:
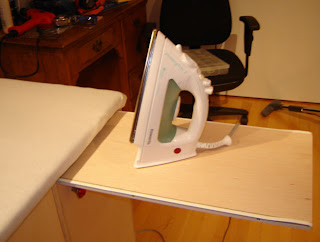
The landing zone. When the iron isn't being housed in the drawer (or on top, as I suspect it will be), I created a landing zone so I can have the table completely covered with fabric and still have a handy place to keep my iron.
I couldn't find a drawer pull for it at the restore center, or any hardware shop, or at any common online hardware store. But, while I was searching for a drawer pull at 11 pm on a Friday night (as you do) I found
this site. The shipping cost twice as much as two pulls (a whole $8.40, but I don't care. They should be on their way to me soon!
Anywho, I've vacuumed the room (such a relief!) and will prime/paint it this weekend. Then I'm going to get back to sewing before I build my cutting table. I've got to think about what worked/what didn't this go round.
If you have any questions, let me know and I'll try to answer.

 And if it comes in a bag with a cool hamster, all the better, right? So, I made some muslin bags. I wanted to be able to remove the rocks and 1) wash the bags and 2) "sun" the zeolite which supposedly clears out the smells once it starts working.