Wednesday, June 4, 2008

Two down, one to go

The pressing table is finished!

The cabinet took one coat of primer and two coats of paint to get an even color. The white makes the muslin look really dingy, but I don't care.

I put it to use the last two nights making up a very quick tshirt. It's so fabulous I think I need to name him.

Me: I really should get the seam roll out, but then I'd have to find it and put it back up.
It: No worries, just pull open this drawer.

later...

Me: Shoot, I need my pressing guide.
It: Why here it is.

So fabulous having two flat surfaces. Normally I have to drape my chair with the cut pieces as I work, but now, I can just move them to the pressing table.

I did decide to put the pressing table against the inner wall instead of the window b/c I do more long term cutting/altering than long term pressing. I need to get a good pic up, though.

Oh, and I did get one thing sewn between starting work on the cabinet and finishing it:

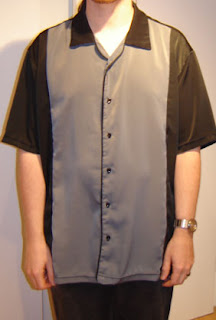
I sewed my husband a shirt he actually likes!!! Of course, it's because he told me to copy another RTW shirt he likes. I used David Coffin's copying shirt video to get me started. It was fairly easy and dh actually likes the shirt. Piping and the collar were a beast, but I got it done.

Now that I've seen how wonderful the pressing table is, of course I don't want to wait to start on the cutting table. Maybe I can get it all done before school starts up again in August.

Tuesday, May 27, 2008

Huzzah!

It still needs painting, but I feel like I've reached a major milestone... All construction is completed.

May I present to you....

the back
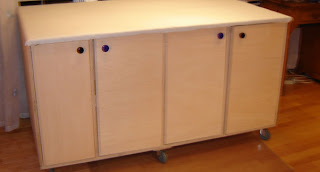
and the front
Sorry about the fuzziness of the pics. I'm not the best photographer anyway, and I'm shaking with excitement (and I'm only slightly kidding about that last part).

I was a little disappointed yesterday b/c none of the drawer fronts line up right, but dh reminded me that it's not a professional job ("and it looks it"). It is my first project with drawers and only my second project with doors, so I'm feeling okay.
All the knobs and handles come from the Habitat Restore center. They were pretty cheap, and I bought sillier knobs because of it. The back has black and blue knobs, the front these cool red jewel like ones.

This is probably more information than you need, but I chose to use pulls on the top with rounded edges because I hate the knob in my kitchen b/c they catch my zipper fly. Hence the three center drawers with pulls.

I did go to the restore center before I began building and thought about cobbling together a cabinet from old kitchen cabinets. It certainly would have been cheaper (probably not even counting the hours of work I've put into this thing), but then it wouldn't have been just what I wanted.

Such as....
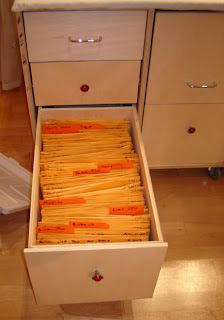

A file drawer to hold my patterns without squishing them. It's slightly wider than the normal so the 9x12 envelopes fit easily AND it's taller so I can have dividers sticking up, and my Jalie and Hot Patterns envelops fit in it as well.

Above that:
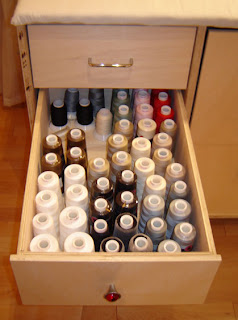
One drawer that holds all my cone thread!

And then:
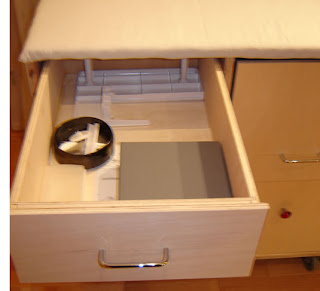
Drawer for random accessories to my machines.

To the right... well, this was actually an accident, but I think it's ended up well. For some reason the top middle drawer did not want to fit. I think the sides of the cabinet ended up not being square. Dh suggested having a larger drawer front, and it works well.
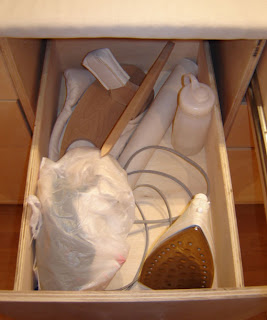
It holds my iron and my lesser used pressing aids (and iron cleaner)

Under that, more patterns (no it's not even half full).

Last column of drawers:
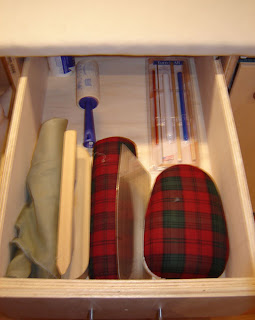
Most used pressing aids on top

AND THEN TWO EMPTY DRAWERS! Who knows what wonders will fill them!

The far right has a shelf for my notebooks with patterns in them. The bottom shelf was originally for those large Jalie and Hot Patterns patterns, but I don't need it any more.

And my favorite piece:
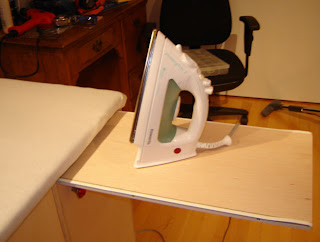
The landing zone. When the iron isn't being housed in the drawer (or on top, as I suspect it will be), I created a landing zone so I can have the table completely covered with fabric and still have a handy place to keep my iron.

I couldn't find a drawer pull for it at the restore center, or any hardware shop, or at any common online hardware store. But, while I was searching for a drawer pull at 11 pm on a Friday night (as you do) I found this site. The shipping cost twice as much as two pulls (a whole $8.40, but I don't care. They should be on their way to me soon!

Anywho, I've vacuumed the room (such a relief!) and will prime/paint it this weekend. Then I'm going to get back to sewing before I build my cutting table. I've got to think about what worked/what didn't this go round.

If you have any questions, let me know and I'll try to answer.

Monday, May 26, 2008

The week that was

Sigh, time to go back to work tomorrow...

I'm almost finished with the construction of the pressing table. I've got to get some screws, and then I'm be at the painting stage. Pics soon.

I was hoping that I would be done (painting and everything) by now, but alas, it's not to be. Had a good time off. Got to see some friends, do lots of "take care of Marcia" stuff. No sewing, but I got to work in the garden some, and made a tart! Yum!

It's the fresh fruit tart from Rose's Pie and Pastry Bible which I received from my inlaws last Christmas (along with Dream Sewing Spaces, so I'm clearly using the Christmas presents well!)

If only my hobbies weren't so expensive, I could keep myself busy for a long time! But alas, time to get ready to go back to work.

Saturday, May 24, 2008

Whoops!

Found my first real flaw in my plan today.

I engaged DH to help me put the wool onto the particle board. We wrapped it, stapled it, covered it in muslin, and then put it on top of the cabinet
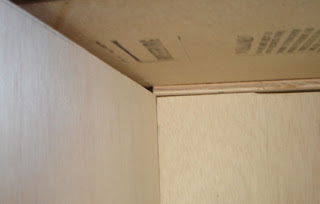
Don't know if you can tell, but the big gap in the middle is where the top no longer fits onto the bottom. The wool (army blanket, doubled over) adds 1/2" of height, which means that my wonderful dado-like objects no longer work.

So, here was the solution:

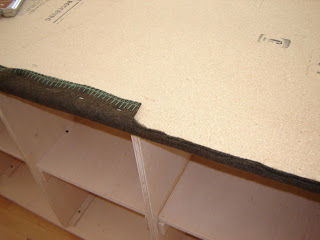
While the original staples were still on, I carefully went through and stapled into the edge of the board instead of the bottom. (The pic above shows the top turned over) Then, I removed the original staples (fun!) and cut off the extra padding, so the board fits on top just fine. I hope I put in enough staples to make it stable.

If I were doing this over, I would just put a simple 1/4" or 1/2" top on the cabinet and make the pressing board separate to sit on top.

Thursday, May 22, 2008

Perhaps not "Pimp"

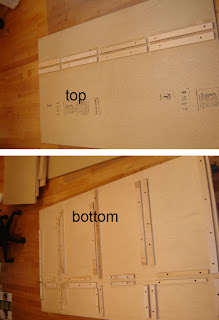
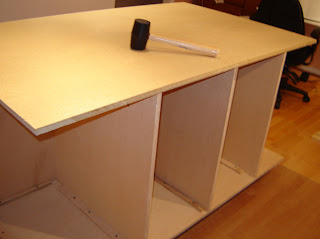
So I'm making actual progress! Very exciting! The pic below is of the top and bottom of the cabinet. Based on my father's idea, I made a "maze" where the vertical boards will come in contact. This has a couple of benefits... 1) It allows me to plan very carefully. 2) it provides plenty of support for the vertical boards. 3) It means I don't have to use dowels. I like dowels and all, but I have a hard time getting things to line up when I use them, no matter how carefully I work.

This maze functions like a dado but doesn't weaken the bottom board by cutting into it. The top is a similar idea but fewer pieces because it won't be under as much stress. The other nice thing about this joinery option is that it allows me to take the top off when I need to replace the muslin cover of the pressing board.

Here's the cabinet with the maze in place. Everything in this picture is staying on without any glue or screws. Just a good mallet whack where needed.

Here's my first four drawers installed. Now I just have to make 5 more! Ugh. The far right will be covered with a door and hold my pattern notebooks and large patterns that won't fit in the drawers (like Jalie)


Here's the back side, which will eventually be facing the windows. I'll cover all these with doors and it will be the "not so handy" storage.


Of course, there are drawbacks to my construction methods. 1) The maze is visible when you open the doors. Not very sexy, but quite functional... Maybe I should call this "foreman my sewing room" instead of Pimp.

I'm trying to decide if I should put an official drawer front on my drawers. They would look nice, but are purely aesthetic, and I can't decide if that's worth it to me. I like progress!!

Tuesday, May 20, 2008

This is the week!

So, I'm taking this week off from work. I just went to see a good friend in St. Louis. She's learning how to sew, and I forced helped her with a robe. It said easy to sew, but it had a cut on collar, which can be difficult the first time around. So, I strongly encourage that she get through at least attaching the undercollar to the neckline.

Now, I'm home. Spent today somewhat piddling with cooking/cleaning, but now I'm ready to dive head first into my sewing table!

Monday, May 12, 2008

Something old, something new

As I've been woodworking, I've been paying attention to how similar it is to my other, much-beloved hobby of sewing. At first, all I could see were similarities, but I'm starting to see differences as well.

Similarities:
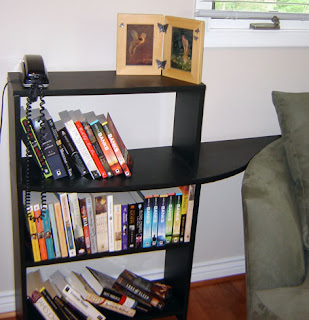
  • You can make something truly unique. I made my wedding dress, and it is by far the perfect dress for me. Likewise, I made this bookcase for the "cuddle chair" I bought for our bedroom. Part of the bookcase slips into the gap cause by the chair and is the perfect for holding a cup of coffee.
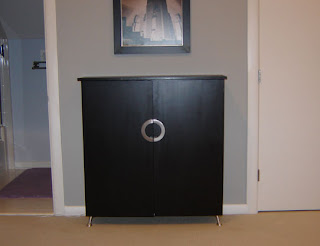
  • They are both great for an person with control issues like me. Too short and fat for store clothes to fit you? make 'em. Can't find a cabinet to fit in a room? make it. The cabinet below was the first thing I made (and in fact, the fact that I couldn't find what I wanted got me started on the whole woodworking thing) It fits perfectly in between our guest room closet and tiny bath.
  • Somethings don't exist for a reason. After you've sewn a while, you get to learn the "rules" like there's a reason high-stretch knit shirts don't have functional buttonholes. Woodworking is the same: remember that perfectly sized cabinet? Part of the reason we couldn't find one to buy was that the pre-made ones were all too deep. Part of the reason the plan was revised mid-process was because the doors were too heavy for such a thin cabinet to hold up. Whoops!
  • In general, mistakes can be salvaged. See above.
  • The 80/20 rule applies. In general, you can get 80% of the job done in 20% of the time. If you want it 100% perfect, you're going to be quadrupling the time you spend. There's nothing wrong with taking that time, but make sure it's worth it to you.
  • Both require DH's help. He's learned to mark with a chalk marker where I tell him to, or put a pin in. He also has to help me lift to the 8'x4' sheets of plywood. He doesn't like either, but he's good enough to help me with both.
  • Both are expensive hobbies. Sure, you can save money here and there with smart purchases and economical habits, but it's still an expenditure. I see many women who sew justifying their fabric purchases by comparing them to their husband's wood shop purchases. My poor dh just gets to watch me spend on both!
Differences:
  • Wood doesn't stretch. It can bend a little, but no compression. "Easing" doesn't happen. You cut it to size, period.
  • Woodworking is messy. Granted, sewing is messy too. But, after some time in the sewing room, a simple run over the floor with a broom and a run over myself with a lint picker-upper, and I'm good to go. After a day in the shop, a shower is required. It makes working on that much more of a "task." I have to be ready to commit.