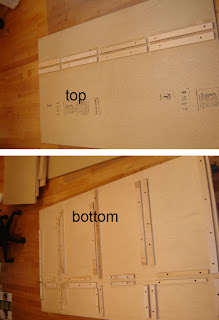
This maze functions like a dado but doesn't weaken the bottom board by cutting into it. The top is a similar idea but fewer pieces because it won't be under as much stress. The other nice thing about this joinery option is that it allows me to take the top off when I need to replace the muslin cover of the pressing board.

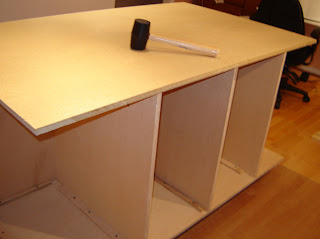
Here's the cabinet with the maze in place. Everything in this picture is staying on without any glue or screws. Just a good mallet whack where needed.
 Here's my first four drawers installed. Now I just have to make 5 more! Ugh. The far right will be covered with a door and hold my pattern notebooks and large patterns that won't fit in the drawers (like Jalie)
Here's the back side, which will eventually be facing the windows. I'll cover all these with doors and it will be the "not so handy" storage.

Of course, there are drawbacks to my construction methods. 1) The maze is visible when you open the doors. Not very sexy, but quite functional... Maybe I should call this "foreman my sewing room" instead of Pimp.
I'm trying to decide if I should put an official drawer front on my drawers. They would look nice, but are purely aesthetic, and I can't decide if that's worth it to me. I like progress!!
No comments:
Post a Comment